[Android][Kotlin] Grid item 그리드 아이템 만들기
by Yena Choi
Grid item
GridView나 RecyclerView의 그리드 레이아웃을 사용하려면 우선 뷰를 채울 item을 새 레이아웃 파일로 만든다.
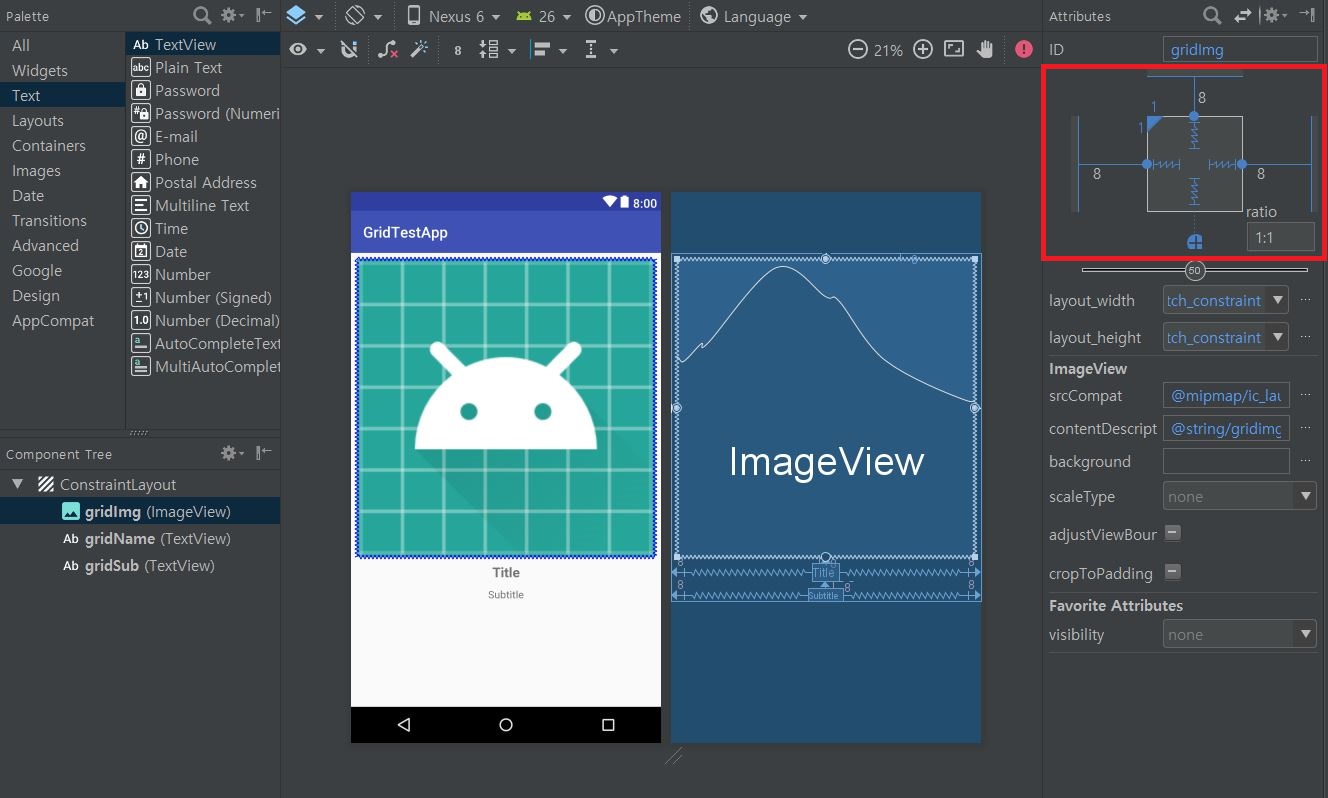
이미지를 정사각형으로 유지하려면 width와 height 값이 같아야 한다. 하지만 dp로 길이 값을 입력하면 화면 크기가 달라져도 이미지 크기가 고정이 되어서 예쁘게 배열되지 않는다.
이럴 때에는 이미지뷰를 클릭하고 attributes 창 왼쪽에서 ratio 1:1 설정과 match_constraint 설정을 해주어야 한다.
<android.support.constraint.ConstraintLayout xmlns:android="http://schemas.android.com/apk/res/android"
    xmlns:app="http://schemas.android.com/apk/res-auto"
    xmlns:tools="http://schemas.android.com/tools"
    android:layout_width="match_parent"
    android:layout_height="wrap_content">

    <ImageView
        android:id="@+id/gridImg"
        android:layout_width="0dp"
        android:layout_height="0dp"
        android:layout_marginEnd="8dp"
        android:layout_marginStart="8dp"
        android:layout_marginTop="8dp"
        android:contentDescription="@string/gridimg"
        app:layout_constraintDimensionRatio="1:1"
        app:layout_constraintEnd_toEndOf="parent"
        app:layout_constraintStart_toStartOf="parent"
        app:layout_constraintTop_toTopOf="parent"
        app:srcCompat="@mipmap/ic_launcher" />

    <TextView
        android:id="@+id/gridName"
        android:layout_width="wrap_content"
        android:layout_height="wrap_content"
        android:layout_marginEnd="8dp"
        android:layout_marginStart="8dp"
        android:layout_marginTop="8dp"
        android:textSize="18sp"
        android:textStyle="bold"
        app:layout_constraintEnd_toEndOf="parent"
        app:layout_constraintStart_toStartOf="parent"
        app:layout_constraintTop_toBottomOf="@+id/gridImg"
        tools:text="Title" />

    <TextView
        android:id="@+id/gridSub"
        android:layout_width="wrap_content"
        android:layout_height="wrap_content"
        android:layout_marginEnd="8dp"
        android:layout_marginStart="8dp"
        android:layout_marginTop="8dp"
        app:layout_constraintEnd_toEndOf="parent"
        app:layout_constraintStart_toStartOf="parent"
        app:layout_constraintTop_toBottomOf="@+id/gridName"
        tools:text="Subtitle" />

</android.support.constraint.ConstraintLayout>
Grid item 개수 설정하기
-
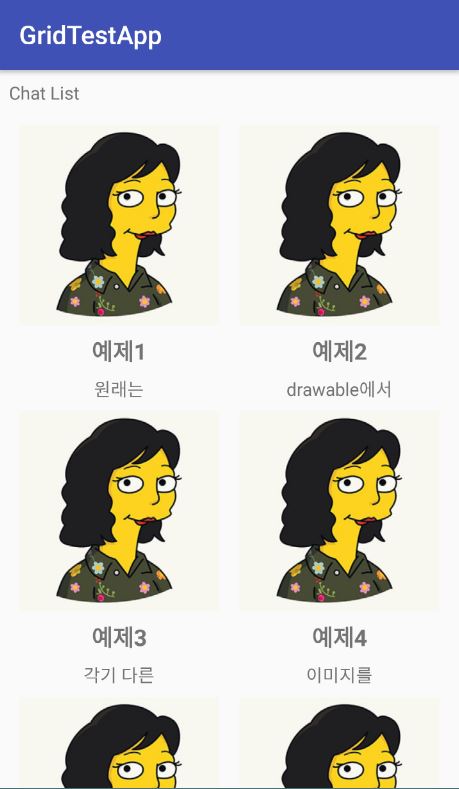
GridView : GridView를 포함하고 있는 Layout의 xml파일에
android:numColumns="Int"옵션을 추가한다.<!-- activity_main.xml --> <GridView android:id="@+id/myGridView" android:layout_width="0dp" android:layout_height="0dp" android:layout_marginBottom="8dp" android:layout_marginEnd="8dp" ... app:layout_constraintTop_toBottomOf="@+id/MainTitle" android:numColumns="2"/> -
RecyclerView : RecyclerView에서 한 줄에 몇개의 Grid item이 들어갈지 설정하려면 LayoutManager를 생성할 때
GridLayoutManager로 만든다. GridLayoutManager는 Context와 spanCount를 파라미터로 사용하며, 이spanCount에Int를 입력해주면 한 줄에 최대 몇 개의 grid item이 들어가는지 설정할 수 있다./* MainActivity.kt */ /* onCreate 에서 LayoutManager 설정 */ val myLayoutManager = GridLayoutManager(this, 2) myRecyclerView.layoutManager = myLayoutManager
context로 this를 넘기고, Int로 2를 입력하여 한줄에 최대 2개의 그리드가 들어가게 설정했다.
위에서 본 것과 같이, item의 최상위 레이아웃인 ConstraintLayout의 width와 height를 각각 match_parent와 wrap_content로 설정했었다. 그리고 ImageView의 비율을 1:1로 고정해두었기 때문에 spanCount가 달라져도 이미지는 1:1 비율을 유지한다.
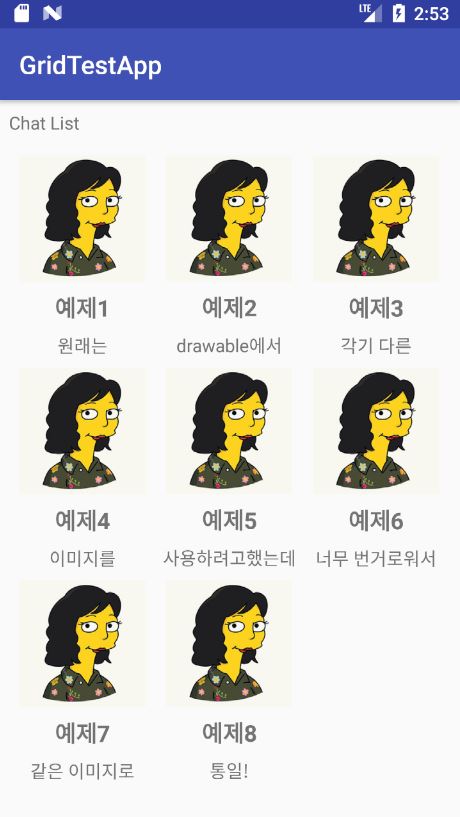
숫자를 3으로 바꾸면 아래와 같아진다.
val myLayoutManager = GridLayoutManager(this, 3)
myRecyclerView.layoutManager = myLayoutManager
화면 방향에 따른 Grid 개수 설정하기
RecyclerView의 GridLayoutManager를 지정할 때, spanCount를 가로/세로 별로 따로 지정해두면 화면이 회전할 때 더 나은 레이아웃을 표현할 수 있다.
현재 화면의 상태는 resources.configuration.orientation으로 확인할 수 있으며, orientation의 값은 Configuration.ORIENTATION_LANDSCAPE나 Configuration.ORIENTATION_PORTRAIT을 불러와 사용할 수 있다.
var spanCount = 3
if (resources.configuration.orientation == Configuration.ORIENTATION_LANDSCAPE) {
    spanCount = 4
}
/* Int변수 spanCount의 default값은 3으로 지정하고, 가로모드 일 경우 4로 재 지정 */

val myLayoutManager = GridLayoutManager(this, spanCount)
myRecyclerView.layoutManager = myLayoutManager
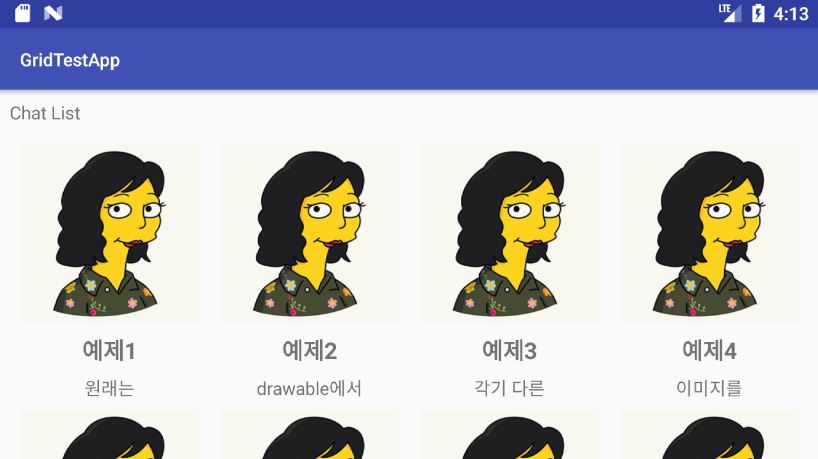
위와 같이 입력하면 세로모드(portrait)일 때 3줄, 가로모드(landscape)일 때 4줄로 표현할 수 있다.